
I shared a good portion of this project over on my Instagram Stories, and then major life events happened one after another. Good news, we are back and better than ever! Now for what you came for, front door content. Last year while working our entryway project, rather quickly did our original plans of an easy facelift turn into a complete gut. Why? Termite damage that could not be ignored. We are talking replacing studs, fresh drywall, and while we were at it a new front door!
Shut the Front Door!
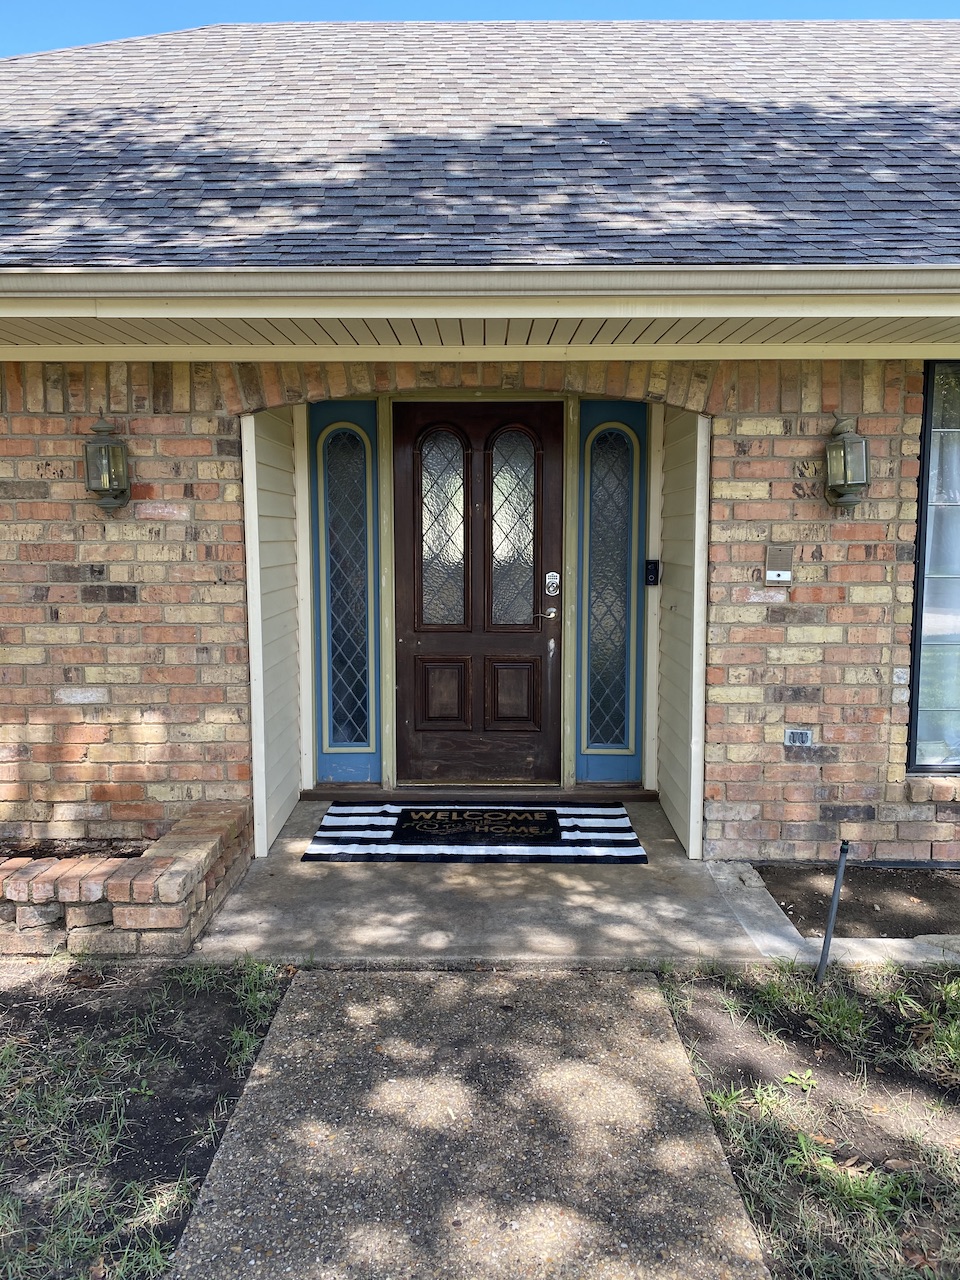
We knew when we moved in that eventually we would need to replace the front door. As a reminder here is what our door looked like when we moved in… Yikes!!
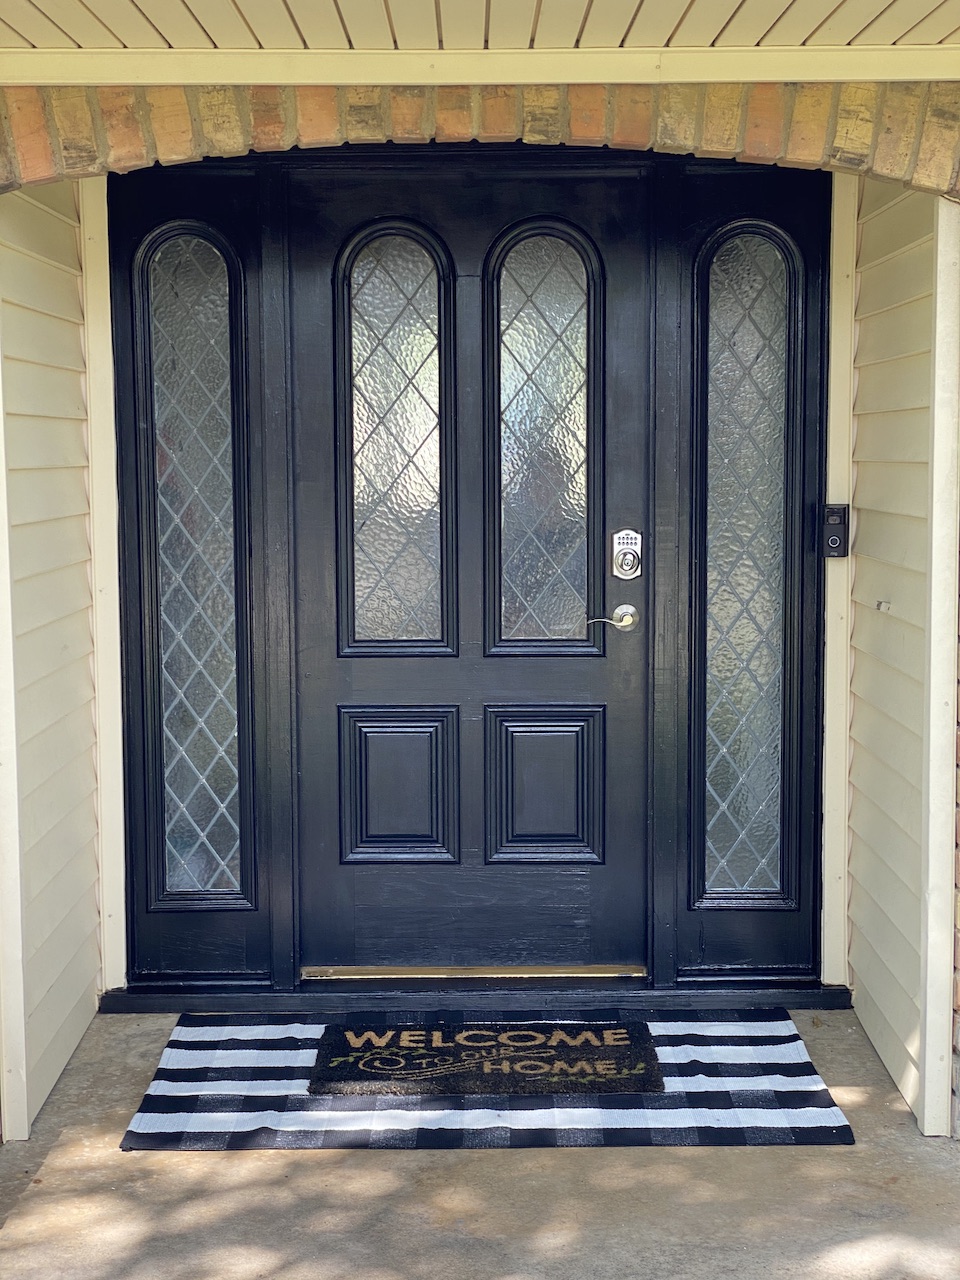
The first update was one of my first temporary home projects. I remember feeling so proud of what a little paint could do, and that uplift held us over for a couple years until we were ready to replace it.
Obviously we were dealing with an outdated door that leaked air. Another coat of paint wasn’t going to magically make this door better. Plus, we replaced every window during the major remodel of 2020 and we needed something to give the curb appeal a boost while we work out landscaping details. I considered double doors for this space since the original door has two sidelights. Once we starting measuring, it felt like we were trying to make something appear and the end result would be an over crowded result. Once I started shopping it sealed the deal because there weren’t any double doors in a size that would work for this space.
Time to go Door Shopping
The first place I started door shopping was really more like window shopping – checking out other homes in our neighborhood. While out for walks or driving the boys to/from school their activities. Being an older neighborhood, many of our neighbors have been doing plenty of renovating. Plenty of styles on display and always fun to see how other people style spaces.
Running into the theme of doors with more glass being some of my favorites, I hit the internet for additional inspiration. The options were pretty overwhelming to be honest and the price points were all over the place. Some were way out of range and others were just not the door I was looking for. After extensive searching of the Big Box stores and not finding what I was looking for, I started looking at my favorite surplus store.
Seconds and Surplus has a fantastic selection of exterior and interior doors for amazing prices. There are several locations across our Metroplex and there were a few in stock. Our original shopping location sold the door in stock just before we got there, but we were able to have a look in person. Fortunately, another store would have one available for pick up that wasn’t too far away.
Door Details
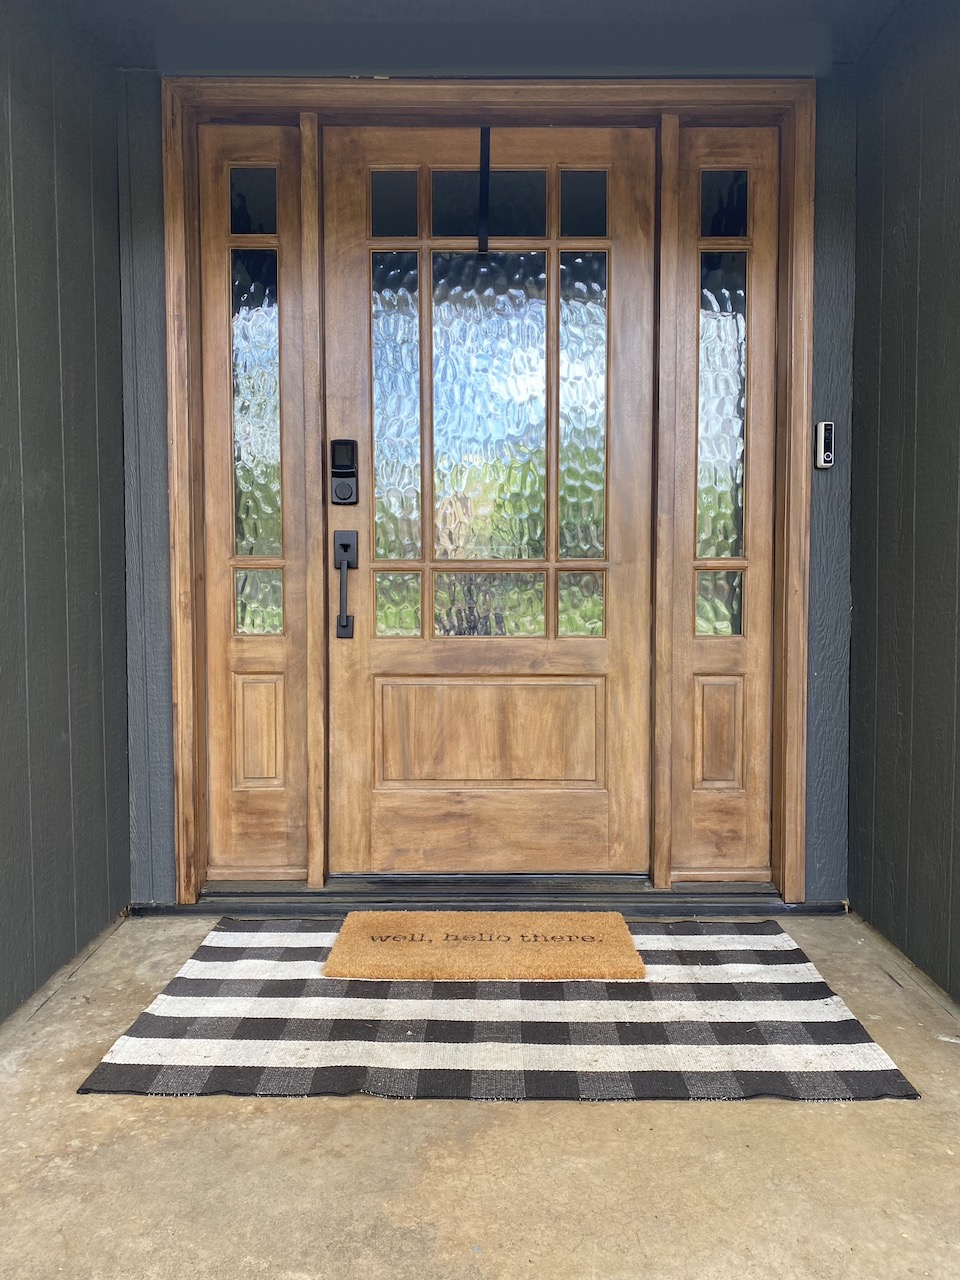
Finally, the door my dreams were made of was coming home! The Flemish Glass allows for light to shine through with the perfect amount of privacy. Te unfinished Mahogany Wood allowed for an extra layer of customization with stain and polished off with quality ball bearing hinges. With all of the boxes checked it was time to bring home the door and schedule the install. We new the install would require a bit of additional framing as the size of the original door wasn’t typical, go figure. Our home was built in the 1970s and I am almost certain the old door was original and I am sure the builders had a great time during work hours. The beer cans that I find when we knock out walls is all the evidence I need!
The Install
Hanging doors on a good day can be tricky, we decided to hire some additional man power for this project. David’s friend Robert is a wonderful Handyman and together they were able to remove the old door, build out additional framing, and install the door in less than one day! The new door was slightly smaller than the original door and we needed a few adjustments to the framing, but with a structural engineer on your side, these things are handled with ease. A friendly reminder, even DIY fanatics like ourselves hire out projects here and there.
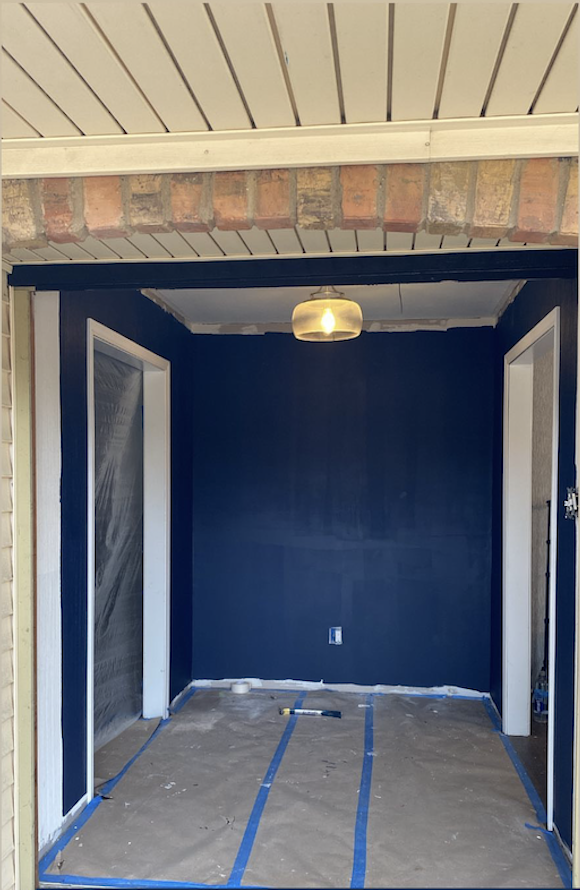
We needed to add some additional mahogany to flush out the exterior framing. Nothing a trip to our local Rockler Woodworking store wouldn’t solve. This also gave us a few pieces of scrap material to test out stain options, win-win!
Time to Stain
Remember how I said I loved the idea of an unfinished mahogany door so I could customize with stain? What I didn’t realize is just how overwhelming stain can be and the strong opinions when it comes to staining mahogany. Mahogany is known for it’s beautiful reddish-brown color and extremely durable nature. I didn’t want to completely take away the natural mahogany tones, but I wanted our door to have an amazing pop. Hours of research and several trips to a local hardware store and I found a winning combo.
If you’ve been around here long you have probably heard me say, “Your finish is only as good as your prep!” This is so true, to get a beautiful finish you have to be willing to put in the prep work. The prep work you ask? Sanding, sanding, and more sanding. After you’ve finished sanding you will need to wipe the surface down with tack cloth before applying stain. Once you have reached your final result, you will need to give your door a few coats of a quality Spar Urethane. Guess what? You will need to sand in between each coat. The finished product will be worth it, I promise.
Stain Used for this Project
The first coat I used Minwax in “Pickled Oak. This semi-transparent, lighter base helped to calm the pink tones in the wood, but nothing too drastic.
The second coat I used Minwax Provincial. A semi-transparent brown family stain with great workability. A light coat on top of the first coat in Pickled Oak provided the end result, WOW factor I was looking for.
I finished with three coats of Minwax Spar Urethane. I chose the clear finish as I didn’t want too much sheen, but I wanted superior protection to protect our investment. Reminder, you will need to sand lightly between each coat of Spar Urethane!
Watching projects unfold and visions become reality are truly what I enjoy the most. The research, hard work, and dedication only add to the satisfaction at the end of a project. This front door and porch have been seen several changes over the years and each one has held a special place in my heart. Furthermore, the growth on the horizon provides all the excitement to come!
Let’s connect! Feel free to drop any questions down below or come hang out on Instagram!