
Our most recent renovation was our entryway! Sandwiched between our Dining Room and Living Room which you can read about on the respective links. This one was so much fun, so I will try to break it all down in this short story!
When we first moved into our home this room was yellow and equipped with a 1970s chandelier. Let’s not forget that slap brush texture. Thick, off the wall, and not for me. YUCK. I painted the walls grey and the door white that helped in limbo.


My original plan for this space was to float/skim the texture to make it smooth, paint the walls, and add in an accent wall. LOL! Silly me. I started pulling off the trim and BAM! One portion pulled a chunk of drywall to exposed termite damage. Don’t you just love that? No, not really. However, we will consider it a blessing in disguise and in turn had to pivot this “quick” renovation. I will say, this renovation was about 7 weeks and in the grand scheme of things, that was quick! We both work full-time jobs, have 3 kiddos, and I also have college coursework. There isn’t much “free time” around here, but we make the time because this creative outlet is so good for my mental health. Ok, back to the renovation.
Some may say that dark, moody colors are “trendy” at the moment. I believe that if dark/moody is done well, it will stand the test of time. Which has been one of my main goals for this renovation project. Taking my time with decisions, lots of research, and conferring with my trusty sources before pulling the trigger. This makes a renovation both cost effective and lessens the likelihood of a re-do down the line.
I went back and forth between two options – Black or Navy. The black option was a snake print wallpaper and I was going to add pops of gold and other bold colors. I have to say, I am so thankful that we went with Navy. This pulls in the other spots of blues and greens that we have incorporated into our home.


I spent a great deal of time researching wallpapers, let’s discuss! There are so many options out there, but not all options are created equal. I’m not just talking about pasted and non-pasted. The quality of the paper is hands down the most important factor. Pasted paper requires you to spray the back and allow the adhesive activate, while non-pasted requires that you roll the adhesive directly to the wall. I will say that if you go with a non-pasted paper, don’t buy the cheapest. I made this mistake in my teenagers room and I have deeeep regrets. It worked out ok, but it was difficult.
I found the perfect Navy Peacock Paper from Rifle Paper Company. This paper was a dream to work with and gorgeous to boot! I was able to match the pattern with ease, a breeze to hang, and of course the most important detail – wrapped outlet covers with no issues! I call that a win, win!
Once I picked out the wallpaper, I knew I wanted navy walls. Since we had to put up fresh drywall, I wanted to give this area a completely different pop! I decided that dimension without sticking off the wall was what I was going for. I did a little more research to figure out how to achieve this, but I should have known better and just text my RoRo – She almost always has the answer. Her response? Get a whisk broom. Check! I ordered Homax Roll-On texture from Amazon because the major retailers around me where out of stock. You’ll need to mix this with water until you get to the consistency of soft ice cream. Once you get this rolled on, you will drag the whisk broom through the wet texture for a light brushed texture. It’s the most perfectly, imperfect addition!
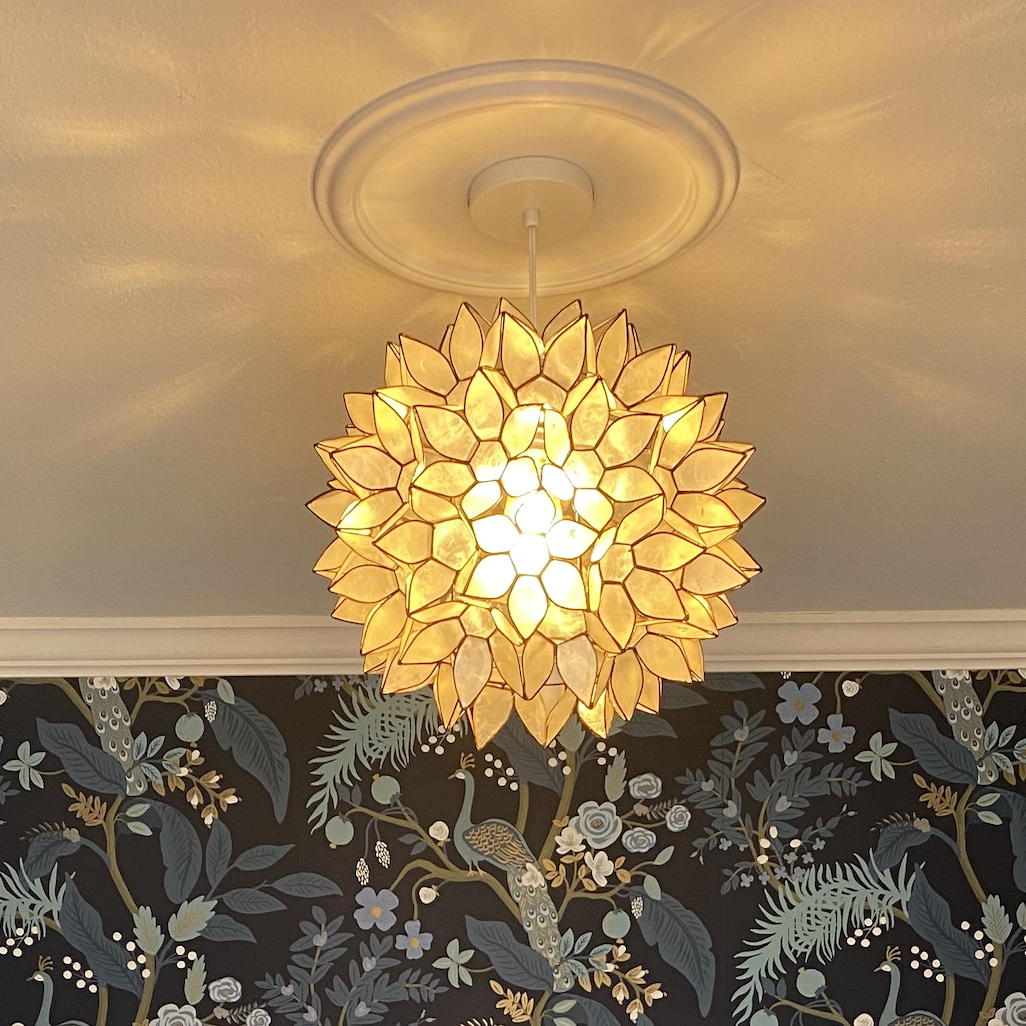
Let’s talk lighting, this is by far my least favorite thing. It’s hard to know what will produce enough light in a space, the size of the fixture, the type of bulb, the price, I could go on and on. In my research I found capiz shell fixtures, and I fell in looove! Most of these are handmade in the Philippines – I love having things that are not mass production and not farmhouse. West Elm, CB2, and Pottery Barn had Capiz Shell lighting options, but they were all pricey and wouldn’t deliver for months. I found a dupe of the Pottery Barn light at World Market and I am so happy with the result!
The grand finale – THE FRONT DOOR! Have you ever shopped for doors with sidelights? A) They are expensive B) Like everything else in these times we are living in they are anywhere from 6-12 weeks out. I did not have the cost in my budget and didn’t have the time to wait in my renovation timeline. Don’t sleep on a Surplus Store. Research, Research, Research. I cannot stress this enough – find a place in your area that is a surplus building store. We scored a beautiful mahogany door with fleming glass for a fraction of the cost and immediate pickup from Second and Surplus. The only detail, is that this door was about 3 inches narrower than our original door. Since we were already replacing sheetrock on the interior this didn’t matter for us. Just remember to measure and remeasure for your space!
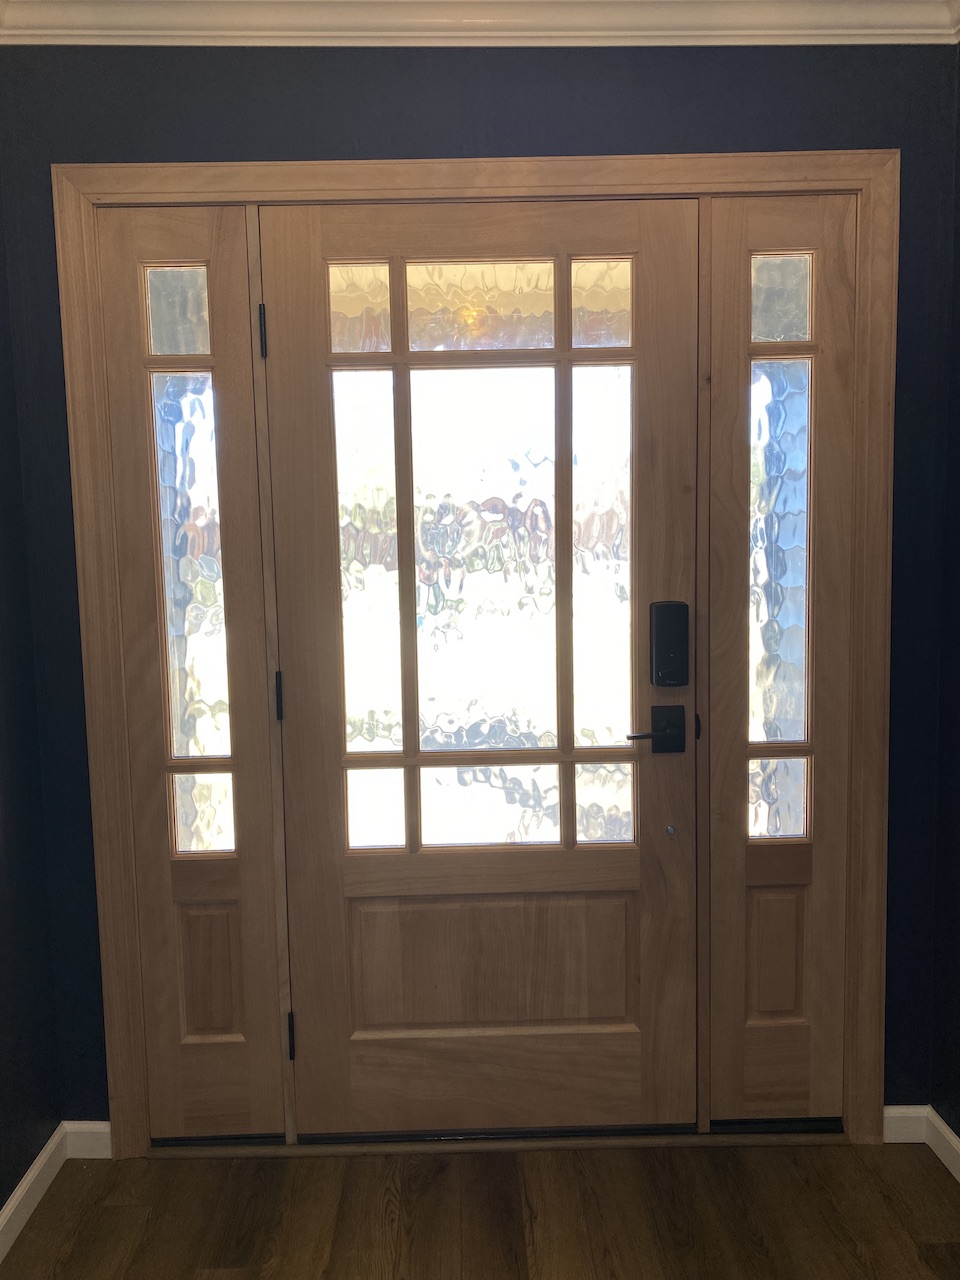
We haven’t stained the door yet, but this part is so hard for me. I love the look of mahogany, but want to just take a touch of the pink out. I am on the hunt, so stay tuned.
All in all, this renovation has been so much fun! I really let my creative brain take over and have fun with the accents in this space. Now its time to starting styling – YAY! Stay tuned and follow along on Instagram and TikTok for more! @houseoflaskey is my handle for both!