
The original kitchen revamp was supposed to last us a while, (insert laughs here). As in, we had zero plans of revamping this space, but we ended up on the most amazing journey.
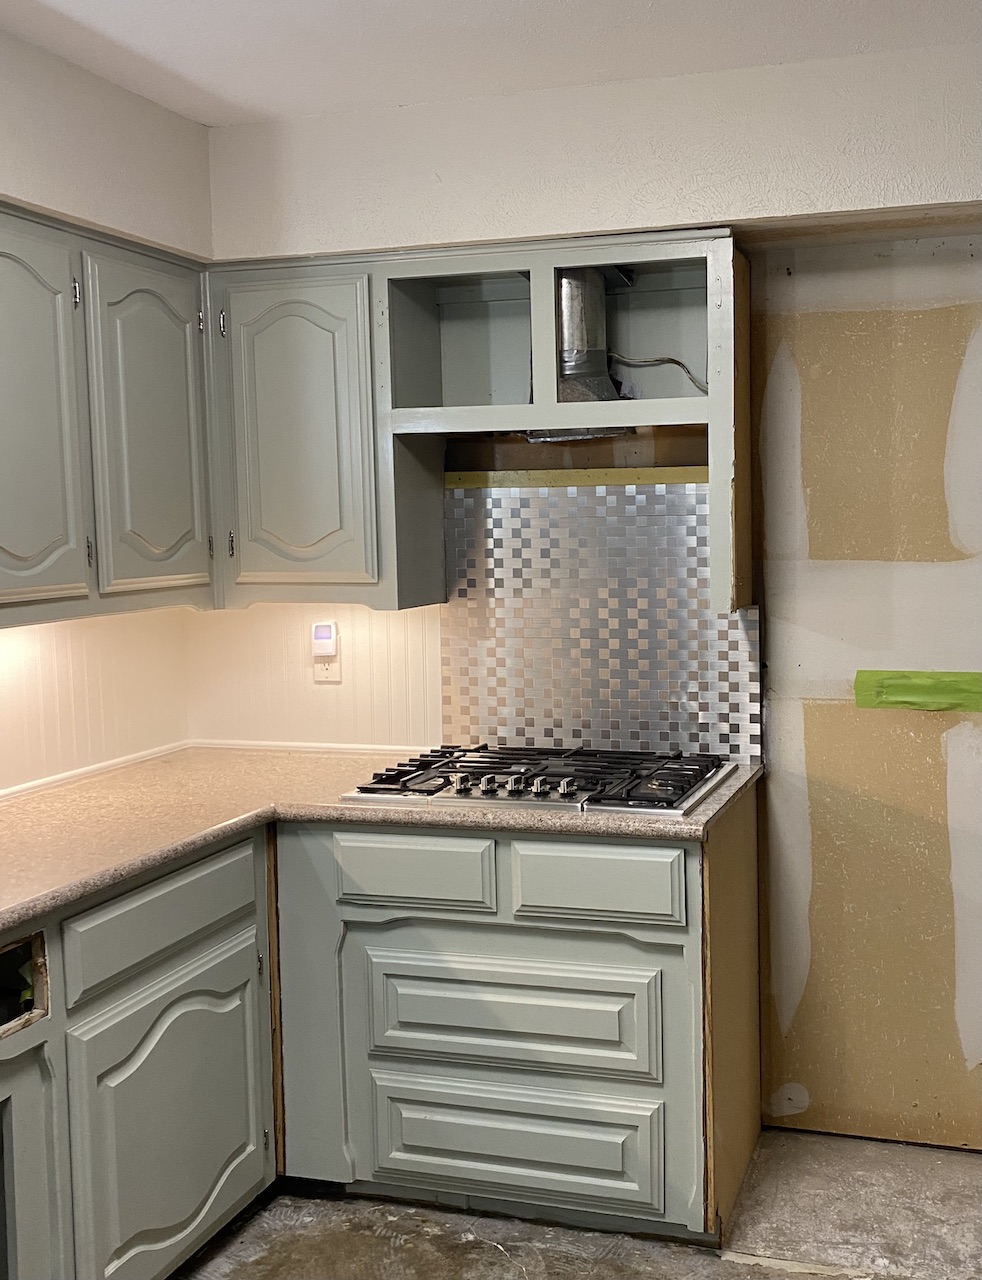
I wanted to focus on the cabinetry and the few variations we have had in this space. The first facelift of the kitchen was on a very small budget. We removed the dark slate floor tile used as backsplash, removed the decorative trim on the cathedral cabinets, relocated the hardware mounts, and finished off with a fresh coat of paint. I matched a spec of green color from our almond mauve granite to be the cabinet paint color. I wish I had kept the name of the paint color because it really is a great color.

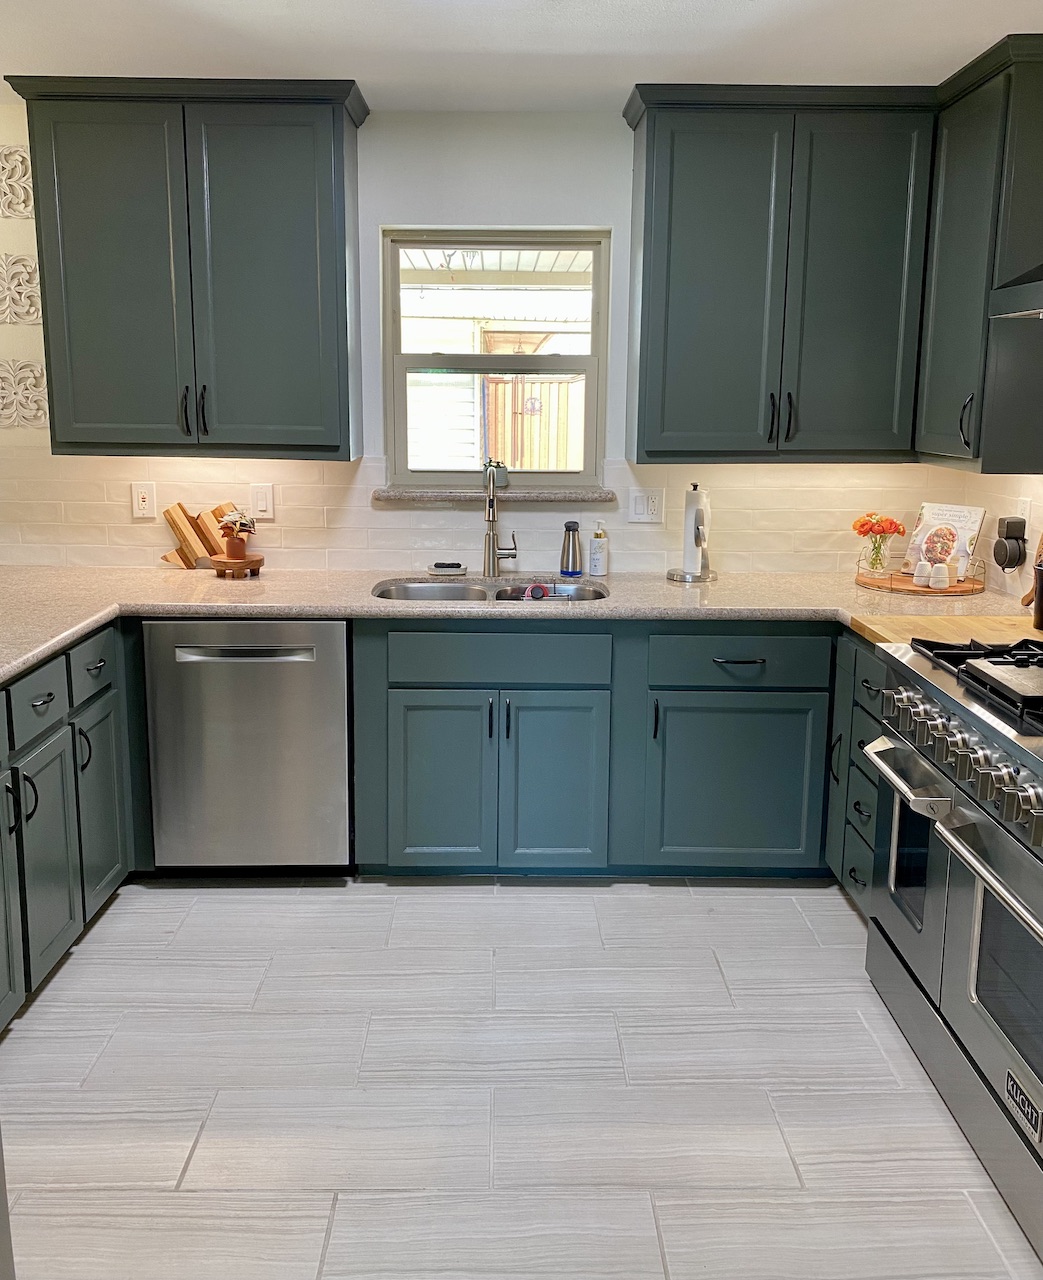
We went back and forth on this project for a few months before we pulled any triggers. Here are the main thoughts we struggled with: Should we keep the existing cabinets and update the doors? Should we remove the soffits and take cabinets to ceiling? Should we completely gut the kitchen? Should we remove the wall from the eat in to the living room? Should we rip out majority of the drywall and update the texture? What are we even doing here? Ultimately, we ended up with a mixture of things; 1) We refurbished the lower cabinets and added a small section 2) Removed the soffits and completely rebuilt the uppers 3) Took the cabinets to the ceiling for additional storage 4) Changed the paint color
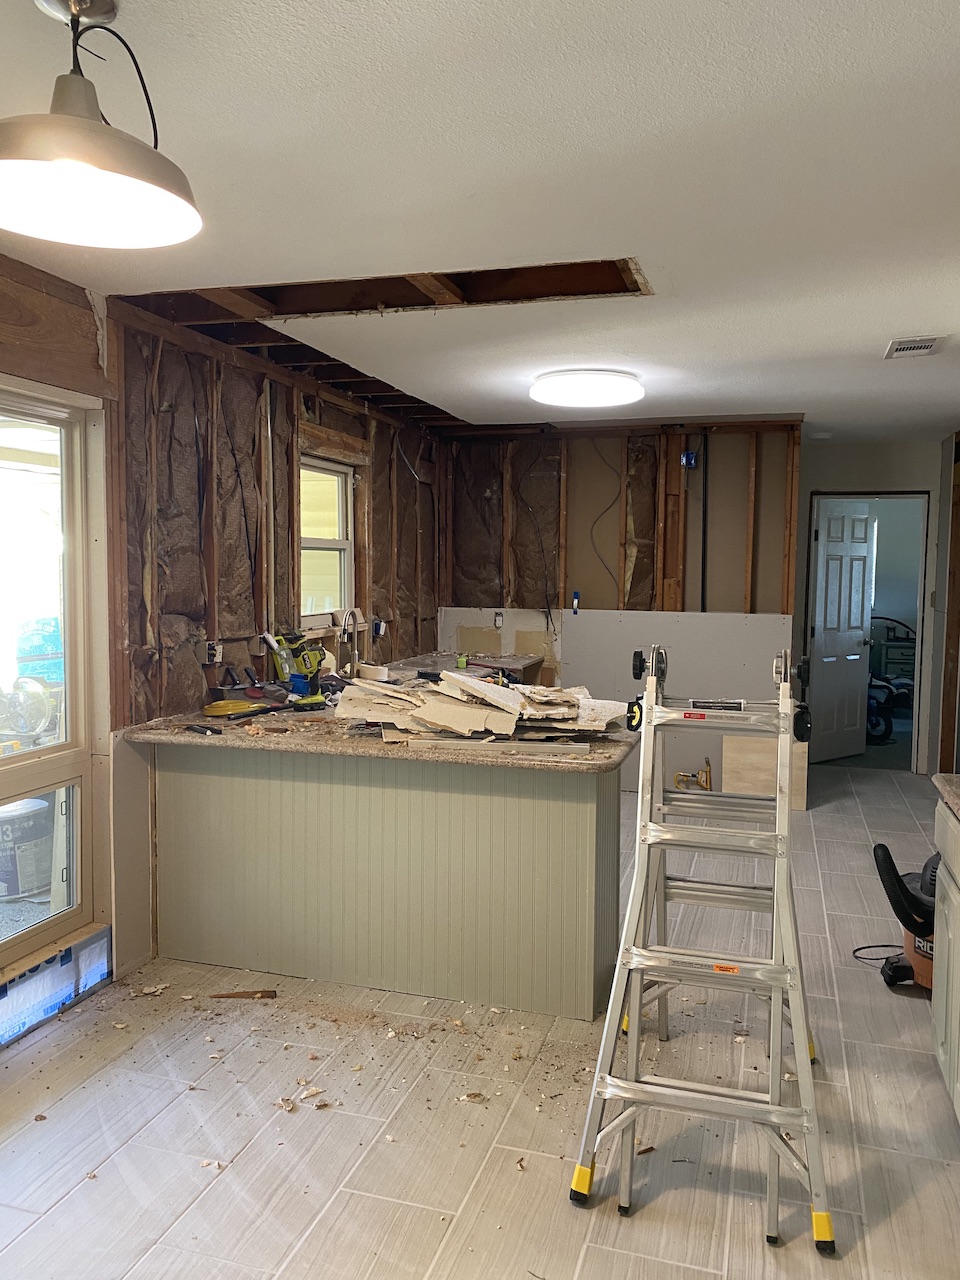
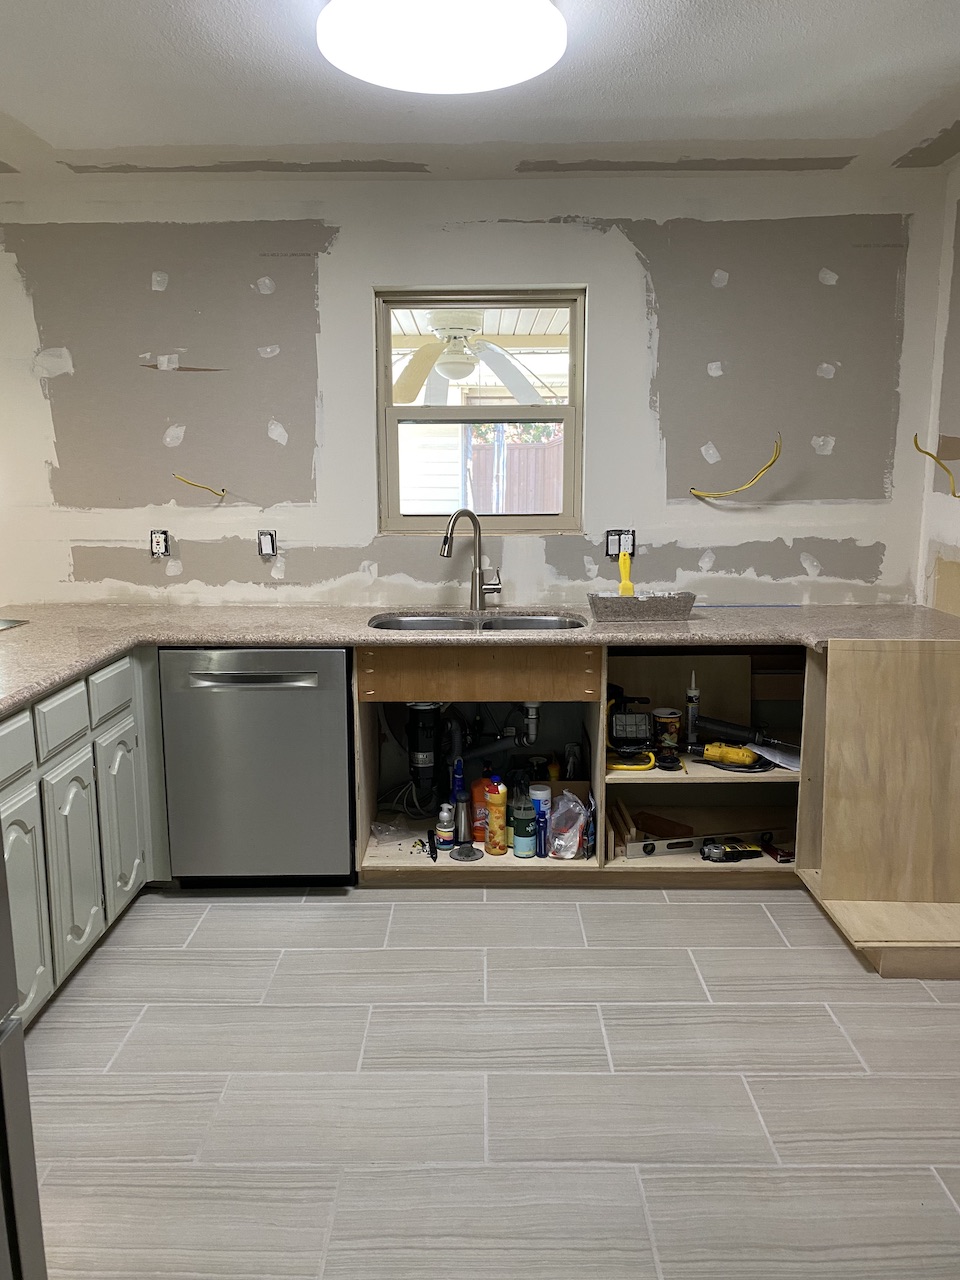
The lower cabinets were in pretty bad shape in a few areas. Lots of water damage and just in need of a general refresh. We did not have the budget to replace the existing countertops, but hope to do that down the line. We had to be really careful with replacing sections and be sure to keep the granite supported throughout the process. Fortunately, the section under the peninsula was solid. The majority of the work on the lower section was to the right of the sink and the infamous “corner.”
Look y’all, I am here to tell you – corners with cabinetry can quickly become a nightmare. We were not thinking about the spacing of the drawers when they were fully extended with hardware. Insert a valuable lesson, here. We are talking inches here. Just a littttttle further over on a few areas for perfect clearance. We were very lucky to have a bit of real estate on one end, spacers in other areas, and a quick fix for one that will need a little extra help down the line. (Rookie mistakes, but learning)
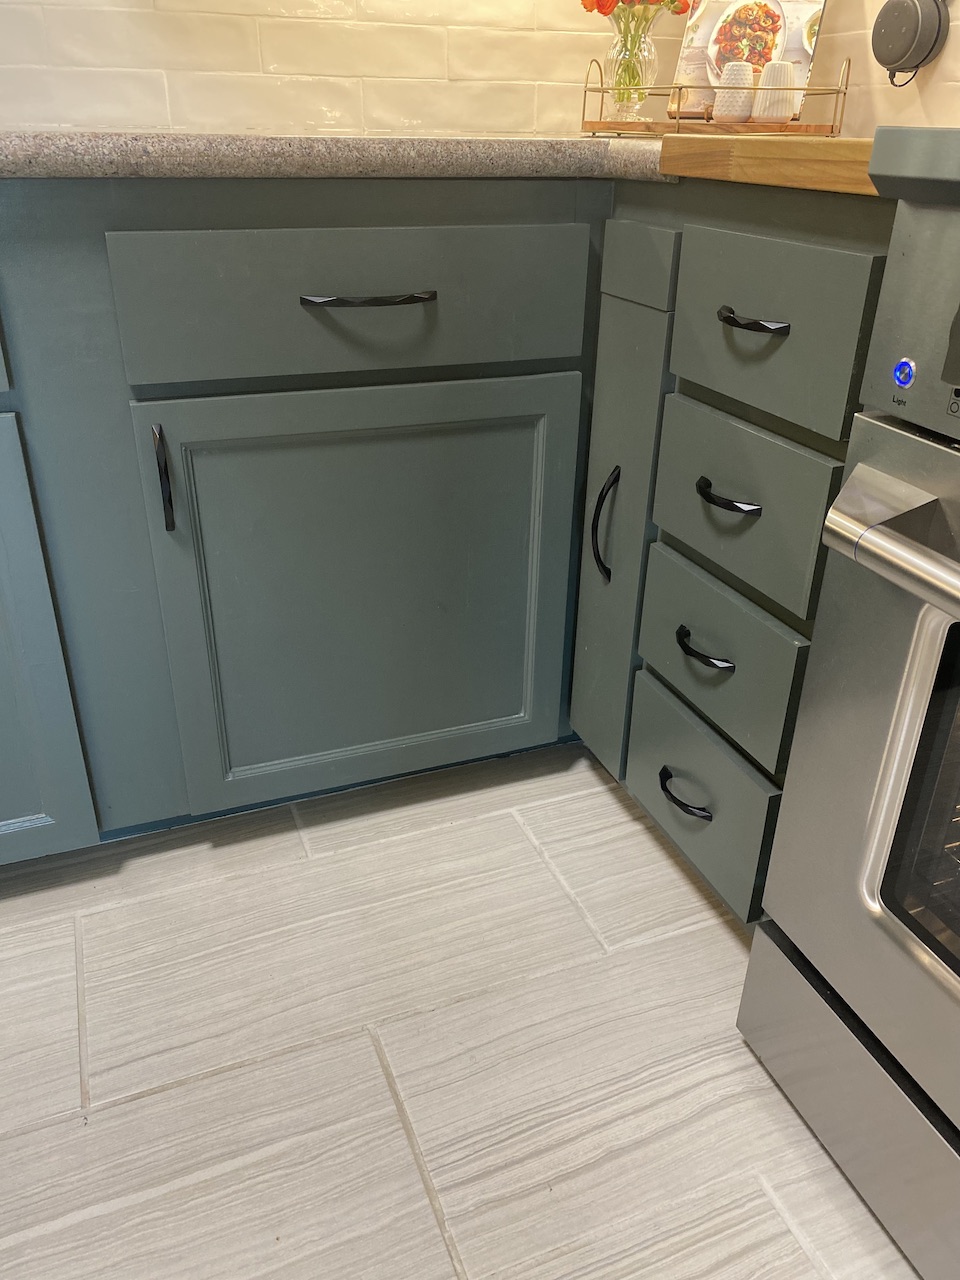
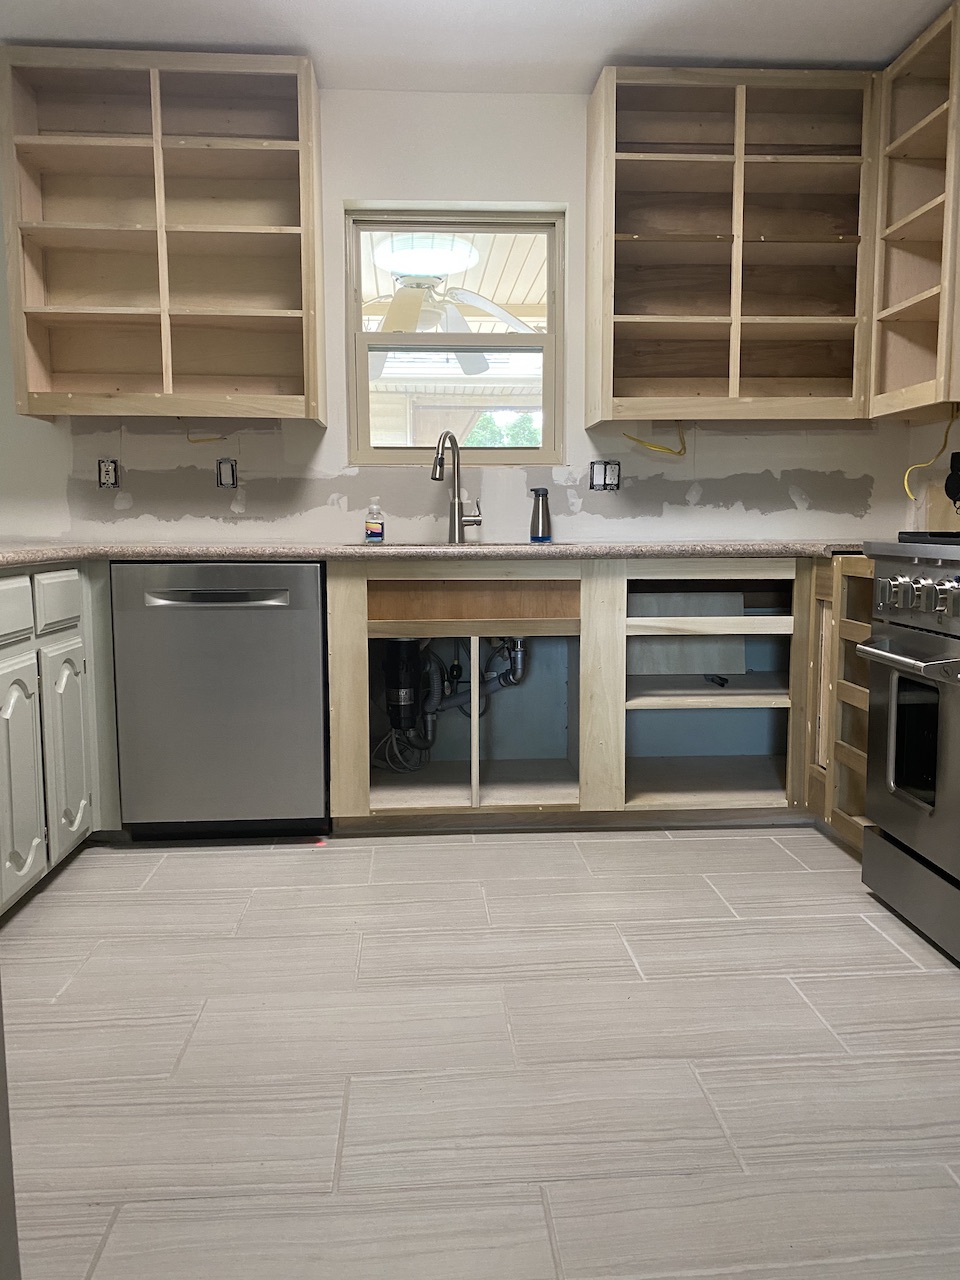
This is where living in the space and knowing things that I wanted came in handy. Things that I wanted; a pull out drawer for cookie sheets/cutting boards, replacing the drawer space lost, and a bit prep space. Replacing the drawers meant adding a section to the existing lower cabinets. That created another issue – adding the pullout and stack section of drawers would leave us without a portion of countertop. Having spent hours prepping and cooking in a crammed corner, I was able to see this renovation with a different set of eyes. Instead of adding cabinetry to each side of the range, thus creating a corner, we kept all cabinets to one side and added a section of butcher block. You know what? I was no longer going to have to prep/cook in a weird corner or hit my head on a vent hood while reaching in the spice cabinet. The prep area is nice for those heavy duty cooking times.
Building new upper cabinet boxes and taking them to the ceiling meant an update for all doors and drawers. We went with a shaker style with a router detail. This soft decorative touch versus a blunt shaker style is the perfect touch. My uncle built the doors/drawers and we painted/installed. Trying to find the perfect shade of green was quite the adventure. I think there were four trips for paint samples to a few different vendors. The ultimate tossup was between two Sherwin Williams colors; Pewter Green and Rock Garden. Pewter Green won with its nod to neutral – while there are some blue tones the grey tones help make this the perfect kitchen color. Not too dark and not too blue.
Final thoughts – you can absolutely update the look of your kitchen with fresh cabinet doors and drawers. With a game plan and a bit of research – you can build your own. Ultimately, think about the best use of your space. If adding to/changing the foot print of an area be sure to give clearance or make a dummy cover. Would you ever take on a kitchen overhaul? I think you totally should!